
Round Sticker Labels for Every Need
A local bakery owner once faced a dilemma: how to label fresh pastries without spoiling their appeal. Plain stickers felt uninspired, so they switched to custom round sticker labels. These allowed them to add their logo and bright colors, instantly making the products more eye-catching. The change didn’t just spruce up the display; it also helped customers remember the brand better, whether they were regulars or first-timers. The owner keeps a printed sheet of their label designs nearby to double-check colors and alignment before every print run, avoiding costly mistakes. Round sticker labels come in handy because of their flexibility. They’re made in various sizes , common diameters include 15mm, 19mm, and 25.4mm, but some businesses prefer even larger options like 30mm or 35mm for bigger containers. Smaller labels work well for price tags or batch numbers on individual items, while bigger ones fit jars or gift boxes perfectly. Picking the right size is a small but important step that prevents labels from looking cramped or awkward. Material choice makes a big difference too. Permanent adhesive labels stick firmly through moisture and temperature changes, which is crucial for food products stored in refrigerators or exposed to humidity. Some businesses switch to removable adhesive when they need to update information frequently without leaving residue behind. For example, a chocolatier updates seasonal flavors and uses removable round stickers so old labels peel off cleanly. This saves time and avoids damage to product packaging. A craft shop owner once printed their round label designs on regular paper, only to find the ink smudging and edges peeling after customers handled the items. Moving to waterproof, high-quality round labels stopped those issues. Customers noticed the sturdier feel and clean look, which reflected well on the shop’s professionalism. The owner keeps a sample book of different label materials and finishes in the store, letting staff recommend options based on the product type and expected handling. Consider what your label needs to do. If it’s meant to catch attention for an event or sale, bold colors and striking graphics work best. For informational labels, clarity is key: simple fonts and ample spacing make details easy to read from a distance. A good habit is printing test sheets before final runs, checking readability under various lighting and angles to avoid surprises on the shelf. For those wanting quick and straightforward labelling, round labels on sheets are convenient. They can be printed at home or office printers without outsourcing. This approach lets business owners tweak designs as needed and print only what’s necessary, reducing waste. Many small retailers keep a stock of blank round sticker sheets ready for last-minute price changes or promotions. Small details matter too. For example, cleaning the surface before applying labels improves adhesion and prevents peeling. It’s common to see labels fall off when stuck on dusty or oily surfaces. Also, aligning labels consistently helps maintain a neat presentation , some businesses use simple jigs or guides for placement during application. Finding the right balance between function and style takes trial and error, but it’s worth the effort. Investing in quality round sticker labels can boost product appeal while conveying essential information clearly. From blank sheets to various adhesives and finishes, there are plenty of options available online at custom sticker printing options for business owners ready to upgrade their packaging.
Transforming Bathrooms for Accessibility
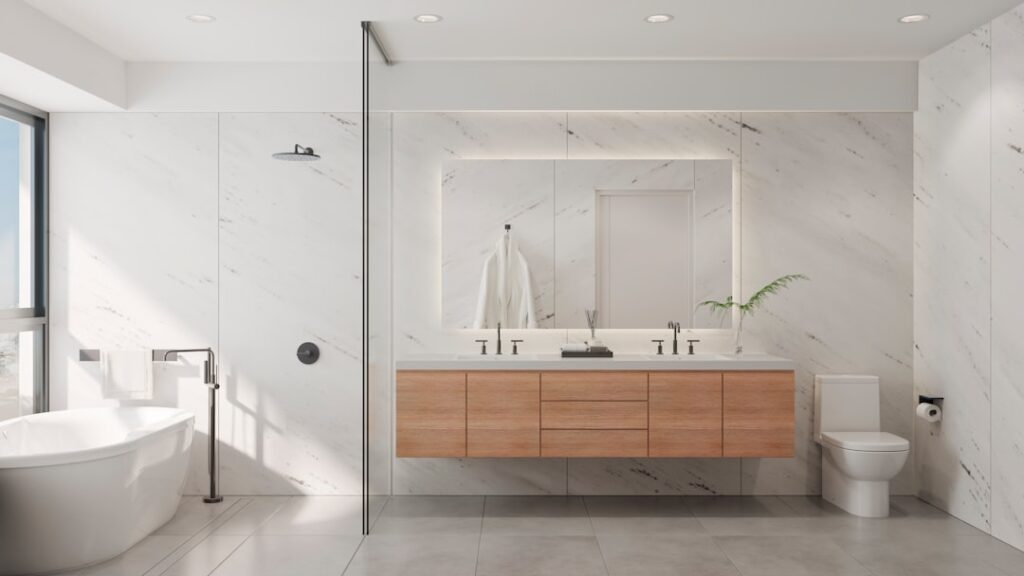
Stepping into a bathroom that feels cramped or awkward can be frustrating, especially for those with limited mobility or aging family members. Renovating for accessibility is about more than looks; it’s about creating a space that’s safe and practical for daily use. Thoughtful design can turn a bathroom into a place that supports independence and ease. For example, replacing traditional doors with pocket doors saves space and avoids tight corners that can be tricky for wheelchair users. It’s common to underestimate how simple changes like these can make a big difference. There’s a false impression that accessible bathrooms have to resemble hospital facilities. That’s not the case. Grab bars come in various styles and finishes, allowing them to blend in rather than stand out. Curbless showers are another smart upgrade, they remove barriers while giving the bathroom a clean, modern look. Choosing slip-resistant tiles in subtle textures adds safety without sacrificing style. These details show accessibility and design aren’t mutually exclusive. Some assume accessible renovations only serve the elderly or disabled. Actually, wider doorways and non-slip floors benefit everyone, including families with kids or those recovering from injuries. Lowered sinks and adjustable showerheads can simplify routines, whether you’re washing a toddler or managing limited reach. These upgrades also add value to your home by making it more adaptable over time. It’s a practical investment, not just an accommodation. Layout matters a great deal. A bathroom designed for accessibility often means rethinking where fixtures go. Toilets might be set at a height that’s easier to use without strain, and vanities could have open space underneath for wheelchair users. It’s important to plan fixture placement carefully to allow smooth movement and avoid awkward angles. Waterproofing is another key factor; using high-quality membranes and sealants helps prevent leaks and damage, which can otherwise lead to costly repairs down the line. Lighting often gets overlooked but it’s vital in an accessible bathroom. Task lighting around mirrors improves visibility for grooming tasks, while well-lit showers reduce risks of slips or missteps. Some homeowners use wall and floor color contrasts to help visually impaired users distinguish edges and surfaces more easily. It’s a small touch but can make a big practical difference when moving around. Clear communication with contractors is crucial throughout the project. Homeowners should be specific about their daily needs and preferences to avoid misunderstandings that cause delays or rework. Contractors experienced in accessible bathroom renovations tend to anticipate common challenges, such as ensuring grab bars are mounted securely into studs rather than just drywall, which is often missed by less experienced teams. Reviewing detailed plans and asking questions upfront saves headaches later. Thinking about your bathroom remodel? Consider how the right changes could improve your everyday life. The goal is a space that works for every user without fuss or compromise. Custom showers and well-chosen tiles add both comfort and style while meeting practical needs. Investing in quality craftsmanship means fewer repairs and adjustments over time. For ideas on design approaches and new trends, visit bathroom remodeling inspiration. You’ll find plenty of real-world examples that balance function with aesthetics.
Apply Waterproof Barrier Paint

Damp basements after heavy rain can cause headaches for any property owner. Moisture creeping through cracks invites mold and can weaken your foundation over time. One effective way to fight back is by applying waterproof barrier paint. This paint forms a tough seal on surfaces like concrete and wood, keeping water out and adding a layer of durability that helps surfaces last longer during wet spells. It’s a straightforward solution but demands attention to detail for best results. Before you grab a brush, know that many waterproof barrier paints work indoors and outdoors, making them flexible for different jobs. For example, a business dealing with persistent basement moisture might coat storage room walls to keep stock dry. Start by cleaning the area thoroughly, dirt, dust, and loose material reduce adhesion. Make sure the surface is completely dry before painting; moisture trapped underneath will cause peeling later. Using a roller or brush, apply the paint evenly to avoid thin spots. Coverage is one detail that often trips people up. Most products list how many square feet one gallon or pint covers. For instance, a pint might cover around 50 square feet depending on the surface texture. Checking this helps you buy the right amount of paint and avoid waste or multiple trips to the store. Using waterproof barrier paint with clear coverage guidelines makes planning your project easier and keeps costs down. Different surfaces need different prep steps. Wood usually requires a primer coat first to help the paint stick and last longer. Concrete often demands patching cracks or filling holes before painting; otherwise, water can sneak in through these weak spots. Skipping these repairs is a common mistake that leads to quick failure of the waterproof layer. Take time to smooth out imperfections, your future self will thank you. Drying time between coats varies with temperature and humidity. Cooler, damper conditions slow drying, so follow the manufacturer’s recommended wait times closely. Rushing this can trap moisture or cause uneven layers that peel off quickly. Typically, two coats are best for durability, but some products might need three in particularly wet areas. Plan your work schedule accordingly, don’t paint if rain is forecast within 24 hours. Many manufacturers provide detailed application guides online that walk you through each step with tips specific to their products. These can be invaluable if you haven’t done this kind of work before or want to avoid common pitfalls. Subscribing to related newsletters also keeps you updated on new techniques or product improvements that could make the job easier or more effective. Choosing the right waterproof paint is half the battle; applying it correctly is the other half. Matching the paint type to your surface and moisture conditions prevents guesswork and rework later on. If you’re unsure about additional materials like primers or sealers, seek advice from professionals or explore further resources available online at basement waterproofing tips. Knowing these finer points will help create a truly water-resistant barrier that lasts.